Eploy Integration
Eploy’s recruiting integration with Willo allows you to seamlessly invite your candidates to a Willo interview. In this article, we will cover how to:
- Enable the Eploy integration
- Configure the integration for each interview
- Invite and review your video interviews
Synchronization Intervals
Please be aware that this integration is subject to synchronization Intervals and as a result, data will not live update.
- Launch Plan: Synchronisation intervals up to 3 hours.
- Growth Plan: Synchronisation intervals up to 30 minutes.
- Scale and Enterprise Plans: Synchronisation intervals up to 5 minutes.
If you require more frequent synchronization intervals please contact us, or upgrade your account.
Enable the Eploy integration
Before getting started, please carefully read the following to make sure you fulfill all requirements for the integration to work:
1. Set up an API user
For allowing access to the Eploy API, it is necessary to create a special user account that will have access to the API.
All Eploy integrations requires a Eploy API plan. You can read more about them here.
If you are not on an API plan, please speak to your Eploy Account Manager.
In Eploy, go to Admin > Users. Here you will see all Users you have the ability to manage.
An API User is a standard user within the system. However, there are certain stipulations to users that can be allocated to an API Key, i.e.
Only one ‘Role’ can be associated (users with more than one role cannot be allocated to an API key).
At least one IP range configured in the ‘Restricted IP Access’ section (without this, your API Key will be unable to connect).
Click New > User to create a new Standard User in the system.
On this form, you first need to complete the following:
- “User Display Name”: Use a unique name that describes the user, e.g. “API User”.
- “User Name”: Use a unique name for your API user.
- “Roles”: You need to assign one Role to the user (only one Role may be assigned to an API User). Please note that the role you choose will affect the permissions allocated to your API User and therefore which permissions, fields, and data can be accessed by the API when you allocate this API User to an API Key. You can design a Role specifically for the API User if you need to restrict certain aspects of the system from being accessible via the API (please see the other articles available in the Standard (Core System) Users section for more help on setting up Roles & Permissions).
- “System Email Address” / “Email Display Name” / “Your Direct / Internal Email Address”: These all need to be set on the API User, but you should use a generic email address that is not used by any real users. It does not necessarily need to be a working email address, because no one should need to see emails delivered to it, so something like “noreply@yourcompany.com” would suffice.
Before saving the user, we need to set up IP restrictions, to allow API access on behalf of this new user.
2. Assign IP Restrictions
Now that you have created the user record, for the user to be able to access the API, you need to specify at least one IP range in the ‘Restricted IP Access’ section.
Click the "Add" button in the Restricted IP Access section to add a new IP range.
Enter 0.0.0.0/0 and press "Save", to allow access from any IPv4 source.
Press the "Add" button a second time to add a new IP range and enter ::/0, to allow access from any IPv6 source. Then press "Save"
Now you can press the "Save" button at the bottom of the page to create and save the API user.
2. Take note of your subdomain
The subdomain is the first part of the URL you use to log in to your Eploy account, the word right before .eploy.net, for example, if your login URL is https://acme.eploy.net your subdomain is the word "acme".
Now enter the subdomain in the connection flow and press "Continue".
3. Go to the API Keys section in eploy
After logging in to your eploy account, go to Admin > Security Settings > API Keys.
4. Open the "Create API Key" dialog
Once in the "API Keys" section of the admin panel, click the New > REST API menu link.
5. Create API Key
In the "Create API Key" page, enter a name for your API Key, then select the user that was created in the first step and press "Save".
6. Add API Permissions
The next step is to add the permissions you want for the ISU. You can find the list of permissions needed in the connection flow.
For each permission, repeat the following process:
a. Press the "Add" button under "API Permissions"
b. Select a permission type in the "API" dialog
c. Check the permission boxes as required, and then save
7. Review permissions and save
After all the permissions have been added to the API key, you can view them all and double check that they match to what is listed in the connection flow:
To save the API key and commit this changes, press the save button:
8. Obtain Client ID and Client Secret
Press the "Generate New Client ID & Secret" button
You should see a new dialog pop up. Press the "Show" link and copy the values of "Client ID" and "Client Secret" into the connection flow:
Then press "Set up integration".
Note: When the integration is enabled, all data will be synchronized. The next synchronization could be up to 3 hours later. For the most seamless integration process, please ensure you have configured all of the jobs you wish to pull through to Willo before enabling the integration.
To get started, visit the Integrations page within the Willo application and search for the Eploy integration. Alternatively, click here.
Expand the integration tile and select Enable. This will launch a pop-up and you will need to grant access permissions to Willo in order for the integration to work.
Once you have enabled this, you will be taken through the authorization process onscreen in order to enable the integration.
Once this is done, you will have successfully enabled the integration - you should see an ‘Enabled’ status appear.
Note: When the integration is first enabled, all required data will be synchronized. This may take several hours depending on the volume of data in your ATS. For the most seamless integration process, please ensure you have configured all of the jobs you wish to pull through to Willo before enabling the integration.

Configure the integration for each interview
Once you have enabled the integration, you will notice an integration dropdown within each of your interviews.
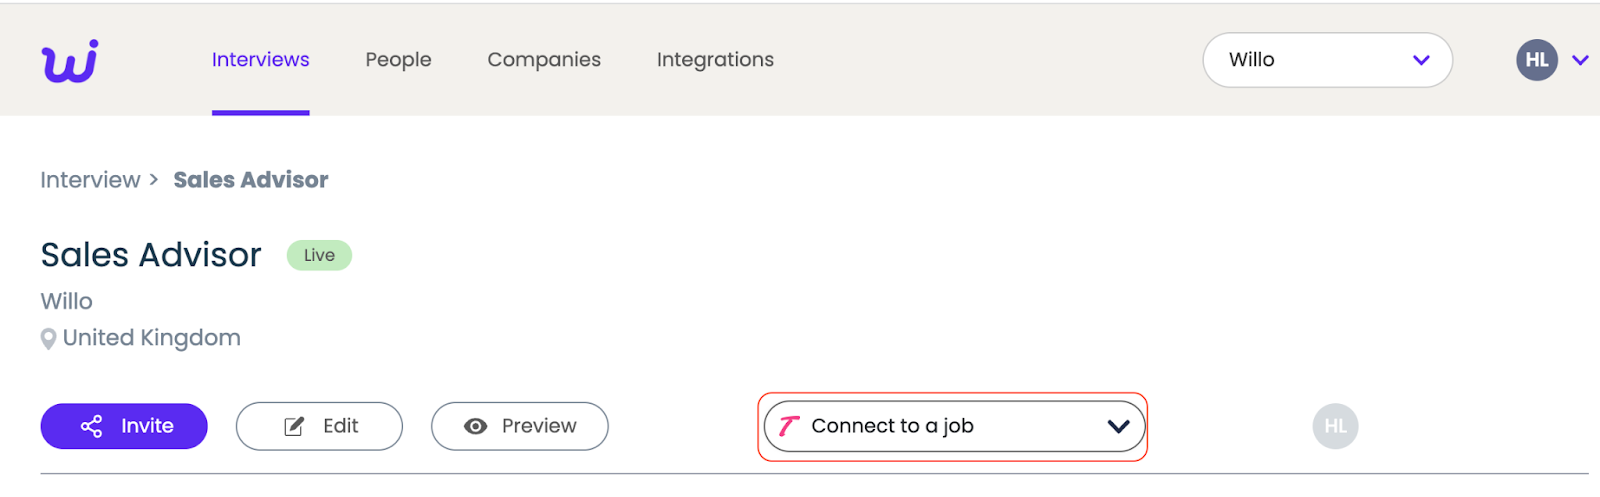
By clicking on this dropdown, you will see the most recent list of jobs imported from Eploy.
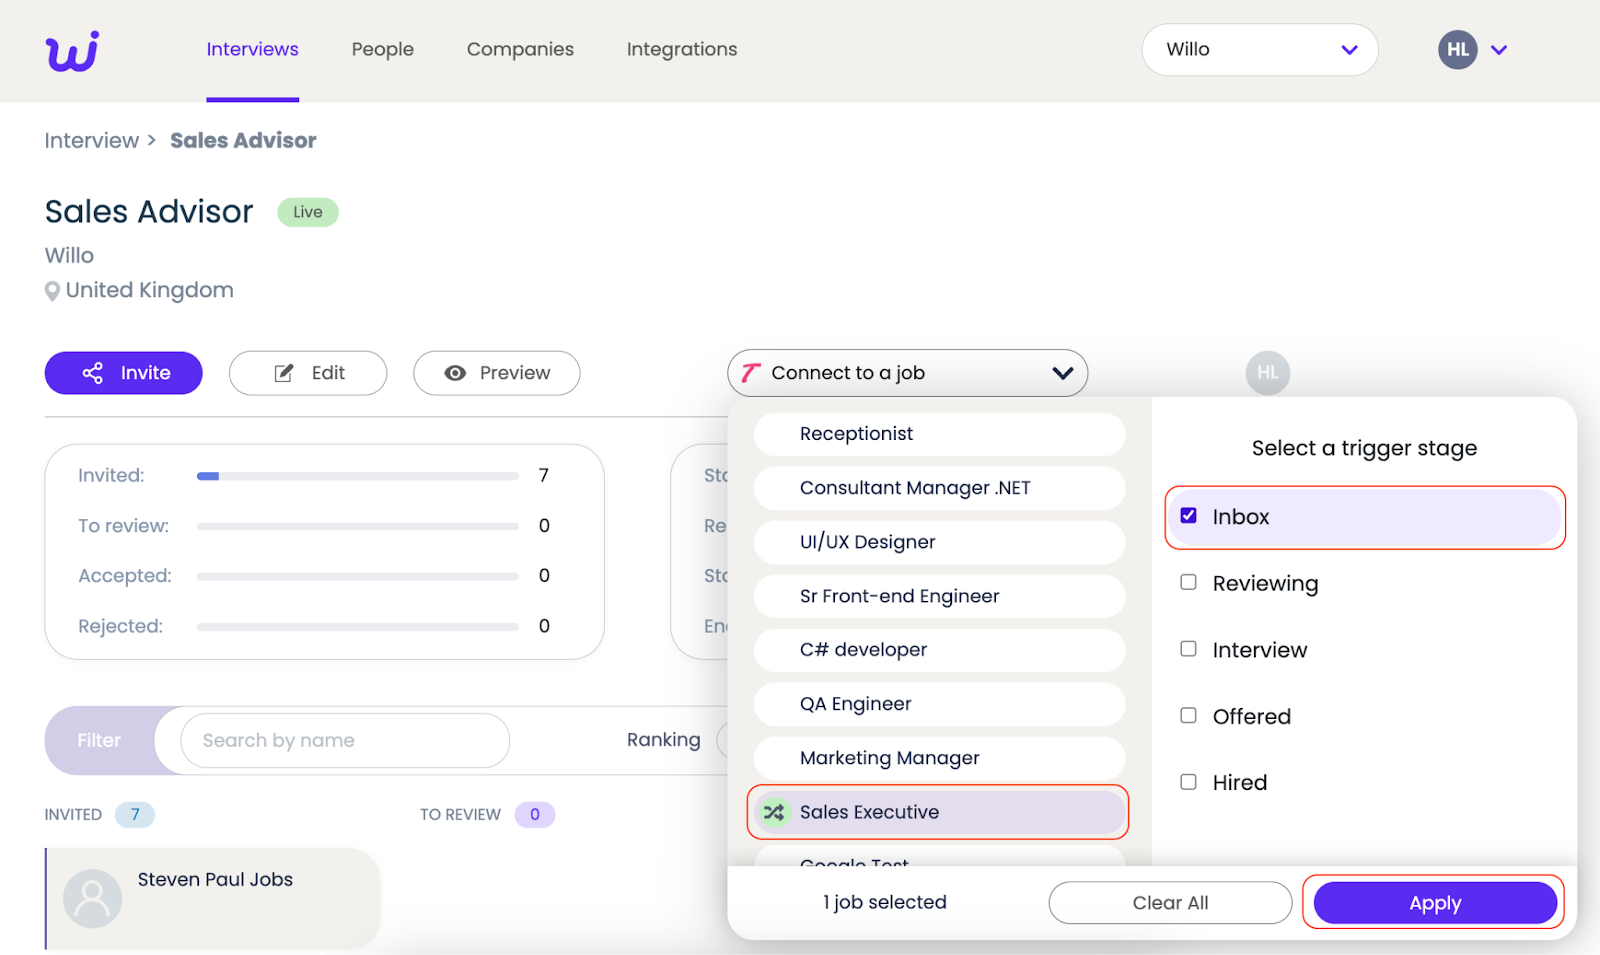
In order to connect one, or many jobs to this interview, you will need to select the desired job and corresponding trigger stage (the point in your process when an invite should be sent to the candidate) and select Apply as shown in the screenshot below.
Invite and review your video interviews
Once your Eploy job and Willo interview are successfully connected, each time you move a candidate to the defined stage(s) within Eploy then they will automatically receive an invitation to participate in the interview.
Once they have responded to the interview, Willo will send their response back to Eploy and you will be able to access it within the candidates record:
- Log in to your Eploy instance
- In the top menu, navigate to "View" -> "Applications"
- Find the application that you want to look at
- Click on the application date to open the application
- The Willo video link will be located in the application notes
